Page 4 of 6 FirstFirst ... 23456 LastLast
Results 31 to 40 of 51

Thread: uh-oh...ripped a hole in my floor

  1. #31
    Well I went to sleep last night thinking about this and woke up ready to tackle it. Two jugs of coffee later I had it completed. Pretty easy actually. The rust in the above picture is just dust. The trim piece and nut had next to no rust, just rust dust. I have no idea why this fails other than it maybe a bad design and breaks upon over tightening. I've never removed the seats so it must have been like this for awhile.

    Sorry for the hijack Dan, just wanted to share my fix.

    This is the bolt from that hole. It came out easy and just has rust dust on it.


    This is the nut. Next to flawless. Primer colored.


    The backside has the 3 little ears that appeared on the trim piece. I think this is supposed be to break away.


    Before bed I made sure I had what I thought I'd need.
    Last edited by 4x4mike; 08-27-2015 at 08:14 AM.

  2. #32
    I had a piece of 3/16 steel so I cut one piece and another piece a bit narrower. Some coffee later I had them stuck together.


    I doubled it up because I wanted to drill a hole and tap it instead of welding on a nut. For one I didn't have a nut and this meant I didn't have to go anywhere. Another reason is that with a nut the patch piece had to be the perfect size and the nut in the correct place the first time for everything to line up. I'm not that good, am not supposed to be bending over and wanted to get this done. Thick patch it was.

    Thick enough.


    Used the patch to make a pattern then cut it out.


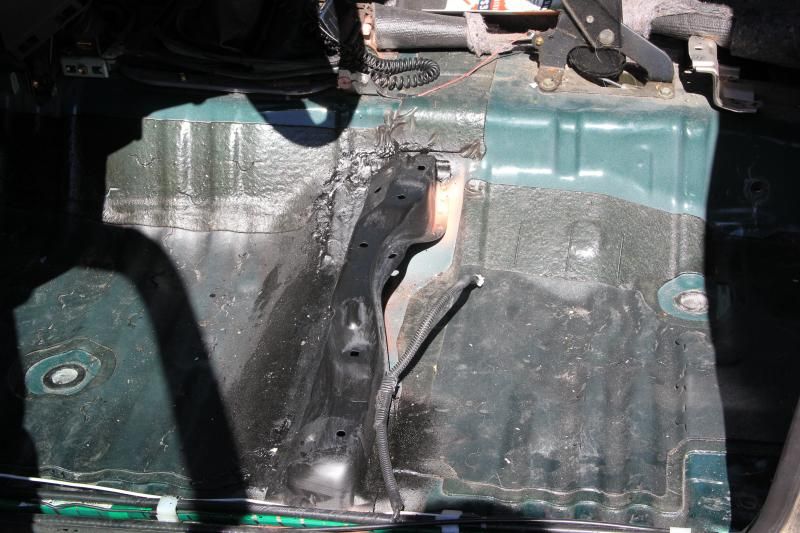
    Got busy with breakfast for the kids and finishing my coffee so my pictures jump to this. Piece is welded in, welds ground so so, hole drilled after reinstalling seat with the 3 bolts, tapped and first coat of black.


    The hardest part of all of this was tapping the hole. I couldn't get my T handle in there enough to do entire revolutions and the hole was a bit small. Metric holes use metric drill charts and I don't have metric drills. Had to go under size, round it a bit and push hard.

    M10X1.25


    All finished. For how much work this is it's a bummer it looks the same. Actually you can't even see it because there is a plastic trim piece that covers up the foot.


    As for why this happens I have no idea. The rear driver side bolt goes through the floor and you can see daylight through the hole. I don't mud or live in the rust belt so everything is clean and that bolt was as good as brand new. All the bolts were reinstalled with some grease on them.
    Last edited by 4x4mike; 08-27-2015 at 08:17 AM.

  3. #33
    I woulda just welded a bolt to it. Tapping musta sucked, get yourself a ratcheting t-handle. Home depot sells them for like 15-20 bucks.
    Marc<br />96&#39; T100 SR5 4x4<br /><br />Other rides:<br />00 Honda 416EX

  4. #34
    I'll get one next time I'm there. I have been meaning to get one for awhile. Then today I had no drivers seat and knew I could finish it quick.

  5. #35
    Quote Originally Posted by 4x4mike View Post

    wow now it makes sense. That is a weak spot for sure. I would be tempted to fix mine better but its been working for 4 years with the ghetto fix lol.

  6. #36
    There wasn't any rust in the cross member piece so I don't think it was a corrosion thing. It's just a weak spot but I believe it's by design. Before putting it all together I sprayed the inside of the cross member with Frame Saver and tried to get the backside of my patch.

  7. #37
    Nice fix. Now you let fat chicks drive your rig without worry.

  8. #38
    key with thin sheet metal is the setting and clean metal. i have a 110v lincoln mig and i used C and 4 for my setting. Make sure you always are welding on clean metal. Also, tack weld on all 4 corners of the pieces you are welding and then fill in the gaps with weld. take your time, let the metal cool, then work on the other.

    edit: looking at the pic again, what I would do is use a metal cutting hole saw, cut out the old metal, and then take sand paper drum on a dremel tool and carefully sand down to bare metal. i'd then use about 18 gauge metal (guesstimating here...its been awhile since i worked with sheet metal and thickness) and cut a hole using a slightly larger diameter hole saw. this will give you a piece that should give you a piece that perfectly fits inside or (better yet) a piece whose diameter is slightly larger. that's a good thing because you can trim the diameter down until it fits nearly perfectly in the hole.

  9. #39
    I've got a Lincoln 110 machine as well. I tacked at C and in between 3 and 4. Once I got the corners in like you said I went down to B and kept the heat on my patch. In the end all that had to happen was a threaded hole to end up where it used to be. I used tools and materials I had at hand in completed it before lunch. So far it's been holding well.

  10. #40
    So, I finally brought the 4Runner in to the body shop last Thursday. Sean brought me over to pick it back up Friday afternoon. The shop drilled out the old part and put in the new one. They added seam sealer as well.


    Got the rest of the stuff buttoned back up today. Now I have 4 bolts holding my seat down again! Woohoo!
    -Daniel2000 4Runner Sport | V6 | 5spd | 4x4 | Leather | 265/75-16 BFG AT/KO | OBA | BudBuilt front skid

    1990 4Runner SR5 | V6 | Auto | 2wd | 3.90 rear | Cobra CB | 265/65r17 Bridgestone Duelers H/Ts | '08 Tacoma 5 spoke rims | Has an 11:1 crawl ratio! SOLD

Page 4 of 6 FirstFirst ... 23456 LastLast

Posting Permissions

  • You may not post new threads
  • You may not post replies
  • You may not post attachments
  • You may not edit your posts
  •