Page 1 of 3 123 LastLast
Results 1 to 10 of 22

Thread: VIAIR OBA kit install, 98 4Runner

  1. #1

    VIAIR OBA kit install, 98 4Runner

    I received the VIAIR 10005 for Christmas. This includes a 2.5 gallon tank and a 2.54CFM, 33% duty cycle compressor, plus all the stuff you need for a standard install. After fighting with a failing MV50 type compressor, it was time for an upgrade.

    http://www.amazon.com/gp/product/B00...?ie=UTF8&psc=1

    Needless to say, installing anything in our vehicles is never standard. I think if you had tons of room to mount everything in optimal conditions, it would be extremely straight forward.

    Because of the limited space in our vehicles, it is more difficult to get this kit to fit, and required a few extra parts.

    The tank:

    I chose to mount the tank under the rear cargo floor, in roughly the space that would otherwise be occupied by the spare tire.

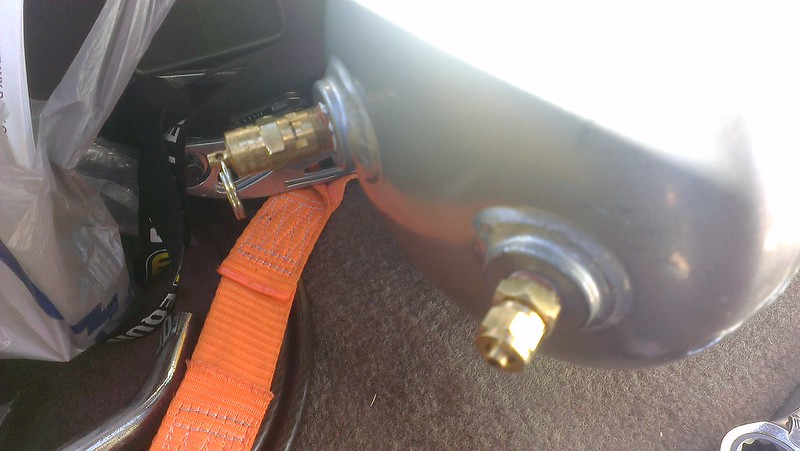
    First, the setup of the tank, which included a couple of right angle pieces to clear tight spots against the body and frame.

    Top of tank:


    This will eventually connect to a hose coming from the compressor (installed before tank was bolted up, but not pictured).

    Driver side of tank:


    On the left is the pressure switch, the right, a compression fitting for the supplied air line.

    On the passenger side is the safety release valve and another compression fitting.


    On the bottom is the drain cock, complete with antiseize on the thread (I have replaced too many of these things in the past):


    Completed tank:


    Installing it was a nightmare. I had to do some yoga and black magic to get the nuts on the bolts. Needless to say, no pictures!

    Installed tank:


    The bolts go through the floor and stick up a little bit. They will get covered with tape, the factory rubber pad, recycled pad, and carpet, and shouldn't really be noticeable.

    The plumbing:


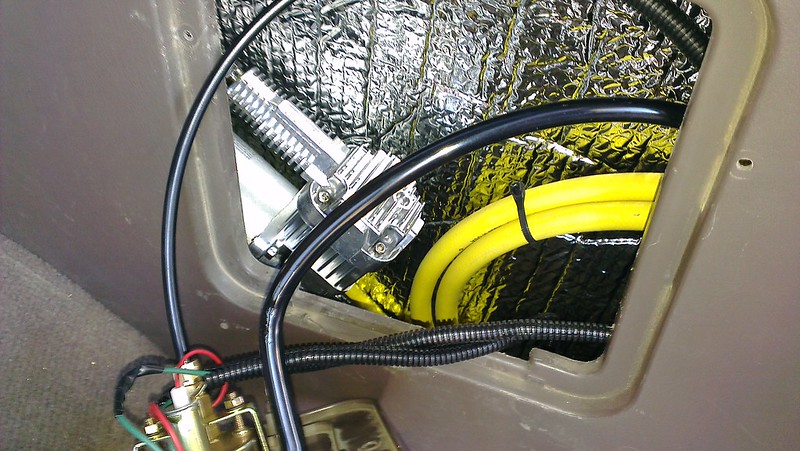
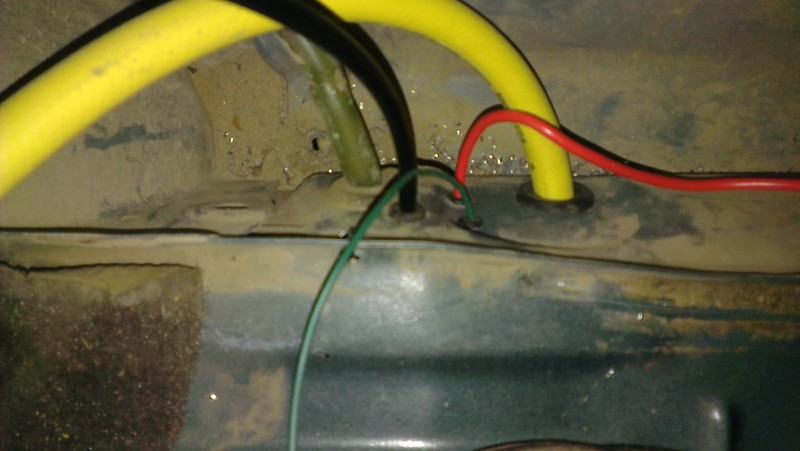
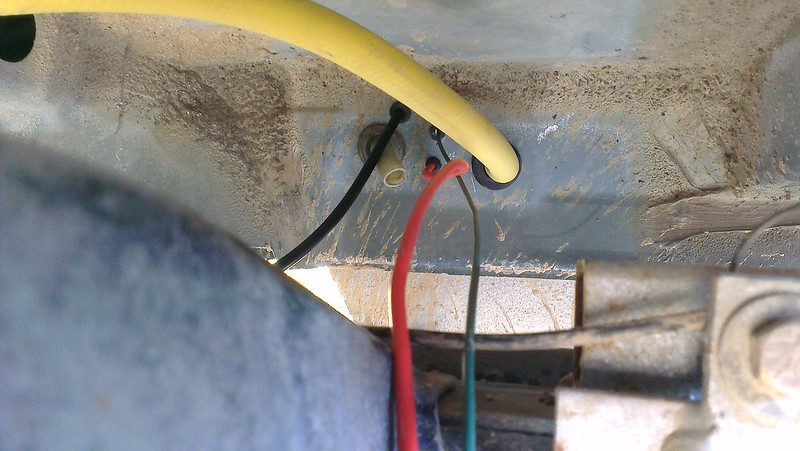
    Yellow is from the compressor, and was purchased separately. It is 10 feet long, but 3 would have been enough. Extra will get coiled up in the quarter panel. Red wire is from the tank relay, green wire is for the relay trigger (switched, more on that in the next post). Black is an air line that will feed the gauge (again, more on that next post).


    Lines and wires from inside the quarter panel:
    Last edited by Seanz0rz; 12-29-2013 at 08:01 PM.
    2005 Lexus LX470 - Stock for now...

    1998 Toyota 4Runner SR5 V6 4x4 + a bunch of goodies. Lifted, Locked, Illuminated and Armored. Winner,"Best Offroad Truck" - 2010 Pismo Jamboree. It's been upside down and still drives me to work.

  2. #2
    The compressor install and everything else:

    Here is where the bolts ended up on the floor:


    They don't seem to interfere with the carpet at all.

    Compressor gets some .75" spacers on the outboard side to sit "level" on the wheel well:


    Also note the foil and bubble insulation on the quarter panel to keep the heat off of the paint and hopefully deaden some sound. It was something I had lying around.

    Everything ready to get the interior panel reinstalled:


    Big red is a 5AWG line from the battery left over from my former stereo amps. Smaller red goes to the relay on the tank.


    All of the electrical connectors that are below the truck got a good dose of dielectric grease. I have had a couple of connections recently that suddenly became less than 100%.

    From the tank access port, the line runs along the brake line to the tank.

    I also spent some time working on the panel for the switch, gauge, and air intake, but that is for tomorrow.
    Last edited by Seanz0rz; 12-30-2013 at 06:51 PM.
    2005 Lexus LX470 - Stock for now...

    1998 Toyota 4Runner SR5 V6 4x4 + a bunch of goodies. Lifted, Locked, Illuminated and Armored. Winner,"Best Offroad Truck" - 2010 Pismo Jamboree. It's been upside down and still drives me to work.

  3. #3
    Finishing touches:

    Everything fits pretty well in the quarter panel:


    What's even better is using the door for the gauge, air intake, and on/off switch:


    It looks darn clean, and the air intake acts as a guard on the air compressor switch (blurry pic, too tired to get another):


    So it works. I found a leak at the top fitting on the tank, spent most of the day fixing that. More than a few of my fingers are bleeding, I've hit my head more times than I can count (probably because I hit my head so many times), and my back is plenty sore from doing palates (or however you spell contortional pain) under the truck.

    Couple of notes:
    The kit is very complete in some areas, and not at all in others. For example, it comes with the little clamps and screws for the air lines, but not the appropriate number of male electrical terminals.

    The air lines could be a bit softer. The hard nylon makes it very difficult to run and mount when it wants to curl up on itself.

    I still have a very small leak somewhere. It charges up to 150 and stops, then drops down to 145psi pretty quick. I am leaving it over night to see if this is just hose swell, or if there is a leak somewhere.

    Installing things where I did was a nightmare. I'd say 80% of my time was spent jamming my hand in some tight crevice trying to get a bolt or nut tight. When I do my rear frame work this spring/summer, I will probably build a different mount for the tank that makes the fitting more accessible. I am not happy with it being so inaccessible, especially in the event of a leaky fitting or hose.

    I mounted the quick connect under the rear hatch, a pic will be posted sometime later in this thread.
    Last edited by Seanz0rz; 12-31-2013 at 05:05 PM.
    2005 Lexus LX470 - Stock for now...

    1998 Toyota 4Runner SR5 V6 4x4 + a bunch of goodies. Lifted, Locked, Illuminated and Armored. Winner,"Best Offroad Truck" - 2010 Pismo Jamboree. It's been upside down and still drives me to work.

  4. #4
    Cool. I love compressed air.

    I know what you mean about finding places for things under a 3rd gen. All I had room for with my system is the little 0.5 gallon Viair tank. It's good and tucked in there but I wish I had a little more capacity but I make do with higher RPM and 100% duty cycle.

    I'm kind of surprised you didn't build a bar or platform to mount the tank and the components to. There isn't much of anything flat under there but it looks like you came up with a solution.

    Is the yellow hose rubber? I've had a couple things on my system that have needed replacing. The biggest issue has been with Goodyear rubber hose. From my manifold I've got a coupler under the front bumper and under the rear bumper. In between all of that I've got two mini filters, the tank and some brass. The hose degrades and splits without a lot of use. As it goes I replace with the PVC/vinyl stuff as it seems to hold up. Ideally I'd have a shut off here and there to isolate the system if I get a leak. Leaving Pismo this year it took twice as long to air up because I had a hose with a hole in it. A hole that wasn't there when I got to the beach. If it were any bigger I would have had to cut the hose and put in a barbed slice piece.

    Where is the compressor going to live?

  5. #5
    Disappointed to hear about the good year rubber hose. We have some in the garage that is 20 years old and still holds 150psi. I think I will go back and wrap the hose so maybe it will live longer.

    All my fab stuff is packed away, so anything requiring more than a knife or drill would mean unpacking boxes and looking for stuff for hours.

    Compressor goes in the quarter panel today (I slept in) and I hope to finish it all today. 6 hours left.
    2005 Lexus LX470 - Stock for now...

    1998 Toyota 4Runner SR5 V6 4x4 + a bunch of goodies. Lifted, Locked, Illuminated and Armored. Winner,"Best Offroad Truck" - 2010 Pismo Jamboree. It's been upside down and still drives me to work.

  6. #6
    Mine was the basic black stuff. I don't know if the yellow is different. A lot of people don't like the PVC stuff especially in the cold but it's very tough, just not supple. I run it through my attic from my compressor to my reel that's on the ceiling (the reel hose has cracks too but I haven't replaced it). I know it gets crazy hot in the summer and pretty cold in the winter up there. There just isn't any sunlight.

    The 4Runner sees light as well as heat and cold. If I had to say the Goodyear failures were on bends. I use elbows so the bends aren't severe by any means but the straight sections seem fine.

    When I was putting parts together for the York in the 4Runner I considered Goodyear insta-grip but it was too cost prohibitive. On my old truck my York system had a few compression air brake fittings as well as hose and those were nice. I figured the insta-grip was the next best thing.

    Kilby is way over priced but has some nice components: http://www.onboardair.com/fittings.htm

  7. #7
    Another thing to watch is the pressure switch and the fittings that hold it to the tank. The length and height of your switch/relay may fatigue the fittings with all the vibration you see offroad.

    I run one of these but mostly for space savings and the fact it's sealed: http://www.viaircorp.com/sealedpswitches.html

    This is the non sealed version. I bought it and after using it decided I wanted a different cut off pressure so I got the sealed type.

  8. #8
    Thanks for the tips! I figured the pressure relay won't last forever. I like that style of switch better, and might upgrade in the future.

    The kit was very complete, except for stuff for our unique installation problems. I think a couple of extra connectors and such would make this ALOT better.

    For the price I got it for, it was well worth it. The compressor and tank, plus some of the fittings, purchased a la carte would cost the same. Basically, you get a bunch of stuff for free.

    I do have a question about mounting the female quick disconnects. What did you use? I was going to use a hose clamp to attach it to the body somewhere.
    2005 Lexus LX470 - Stock for now...

    1998 Toyota 4Runner SR5 V6 4x4 + a bunch of goodies. Lifted, Locked, Illuminated and Armored. Winner,"Best Offroad Truck" - 2010 Pismo Jamboree. It's been upside down and still drives me to work.

  9. #9
    For both hoses I use a conduit bracket.


    I forget which size but I bend it around where I can stick on bolt through both holes and then mount that to something. On the front I've got the outlet, a rock light and my factory fog mounted to a spot the factory bumper used. It's all compact and out of the elements.

    Here is a picture when I first installed everything. Cheap HF hose, factory skid plate and bumper. It's not in this location anymore but when it was it was tucked up behind the factory bumper. I have little caps I put on the coupler to keep dirt out.


    The rear is mounted on the rear bumper. There are a few factory holes on the underside lip. I put the both through one of those and the hose/coupler ends up behind the bumper out of sight but still accessible. Since you have a plate bumper on the back with flat surfaces I'd spring for a bulkhead fitting pointing up.


  10. #10
    I was thinking of one of these:

    2005 Lexus LX470 - Stock for now...

    1998 Toyota 4Runner SR5 V6 4x4 + a bunch of goodies. Lifted, Locked, Illuminated and Armored. Winner,"Best Offroad Truck" - 2010 Pismo Jamboree. It's been upside down and still drives me to work.

Page 1 of 3 123 LastLast

Posting Permissions

  • You may not post new threads
  • You may not post replies
  • You may not post attachments
  • You may not edit your posts
  •