


Back again, and this time it’s the slider project that was completed. Why a ‘project’? Well, the time that was required made it so. Every step was carefully planned and realized with the help of talented professionals. Big props to the pros mentioned in this post, because everyone contributed immensely to this project.
Initially, I wanted to go with the basic slider design without kickouts. I have seen the ones from Trailgear, Stubbs, and 4 Crawler to name a few. From what I read, the length was the most important variable. Then, I ran across some sliders with a kickout. I decided to go with these because it would afford more protection and be used as a step after the lift kit gets installed.
Also, the KOs (kickouts) would match the ‘lines’ started by the stinger bar and hoops on my Armorology bumper and further set it apart from the many 3rd gens out there. The added protection of the KOs was a bonus (Yeah, at this point form did supersede function…but hey, this is my DD…).
So, my initial call went out to Richard Stubbs at Stubbs welding (www.stubbswelding.com) and the project was started. As you know, Richard has many different styles of sliders available. He informed me that the particular model of slider, with the single kick out (SKO), was still available despite not being offered on his web page. He has improved the old style standard kickout with a new heavier duty offering, the HDSKO. After asking me some questions about what type of wheeling I was planning on doing, he recommended either the standard set or his new HDSKOs. I decided to go with the HDSKOs, however, I was really wanting the look of the old style. He said that he could fab up a set of the HDs to look like the ‘old school’ model. He would have to tweak the blueprint a bit, but there was no problem. 1 ½ weeks later, he called and sent an email confirmation (photos attached) saying that the sliders were in the mail. Here they are…look at the form of these babies
[img width=800 height=600]http://i164.photobucket.com/albums/u38/bigwapitijohnny/Sliders/jk1.jpg[/img]
[img width=600 height=800]http://i164.photobucket.com/albums/u38/bigwapitijohnny/Sliders/jk2.jpg[/img]
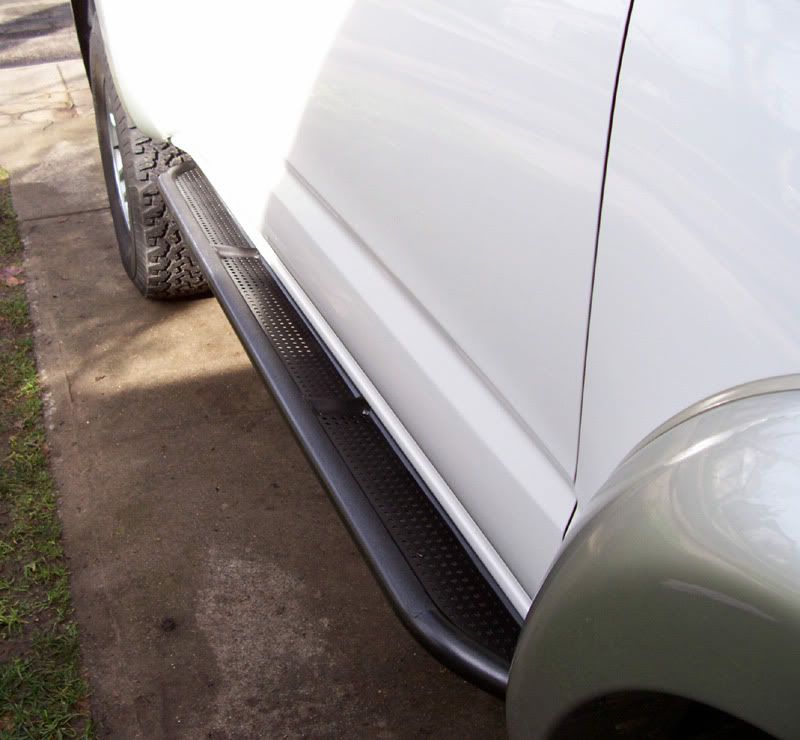
Step design - The second phase of this project was to incorporate treadplate onto the slider and make them function as a step. Also, this would add a little more protection to the rocker panels and doors from road debris. I have read posts from various others, and really like what they have done to pull this off. Slee offers up some really nice ones, but their current offering for 3rd gen 4runners are not what I was looking for.
My vision was to place some treadplate on top of the sliders. Welding the plate could not be done due to the use of dissimilar metals. Thus, a mounting system was required. Richard and I discussed various mounting schemes (tabs, rails, etc…) and finally, Richard came up with TIG welding some nuts on top of the slider so that I could bolt the plate directly onto the slider.
[img width=800 height=600]http://i164.photobucket.com/albums/u38/bigwapitijohnny/Sliders/IMG_1199.jpg[/img]
The nut size was that of ¼ thread design and the bolts fit like this…
[img width=800 height=600]http://i164.photobucket.com/albums/u38/bigwapitijohnny/Sliders/IMG_1200.jpg[/img]
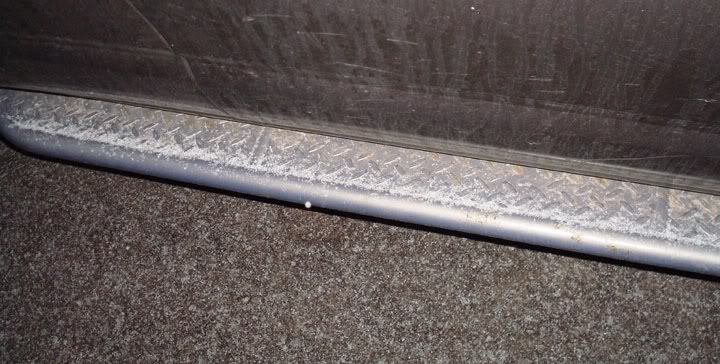
Plating - I did not want to go with the common diamond treadplate. I see that plate everywhere. However, the 5 bar raised is not very common here in the states, and I was hoping to find this stuff somewhere here. This plate is popular in Australia, Europe and Japan. I called many metal suppliers and found out that Alcoa makes this stuff, but only in limited quantities. I was quoted $700.00 for a 4’x8’ sheet at one local metal supplier. Needless to say, the step idea was coming to an end. Then I found Scott at Cutsmetal (www.cutsmetal.net). He had access to this plating, and he had it available at an INCREDIBLE price. If you need any kind of plate, you better call him first. Shipping was prompt and the service could not be beat. Here is an example of the 5 bar.
Step template - I was able to mock up some cardboard forms to transfer both the shape of the plate, as well as transfer the bolt locations onto the metal. The transfer for the bolt locations was difficult. I ended up 'painting' the bolt heads, then I placed the cardboard on top. I then traced the form unto the plate and got it cut with a plasma cutter. I finished the edges with a power sander and varying grit paper (40, 80, and 120). The aluminum was .125 gauge in thickness, but it was relatively easy to grind and make smooth. I had to initially knock off the edges with a file, but the aluminum was soft enough that it took no time at all.
[img width=800 height=600]http://i164.photobucket.com/albums/u38/bigwapitijohnny/Sliders/IMG_1202.jpg[/img]
[img width=800 height=600]http://i164.photobucket.com/albums/u38/bigwapitijohnny/Sliders/IMG_1203.jpg[/img]
Coating - I wanted to go with a coating process that would stand up to the abuse off-roading. Paddlenbike's post really got me reconsidering the use of paint. It is apparent that paint does will not hold up very well, so I went with an Ameraguard coating.
[img width=532 height=800]http://i164.photobucket.com/albums/u38/bigwapitijohnny/sliders-work.jpg[/img]
It is similar to that of Rhino and Line-X, but it is more UV resistant. Both Rhino and Line-X are Aromatic Urethanes and will eventually crack, peel and fade despite the addition of UV stabilizers, it is chemically impossible to prevent this. However, the Ameraguard product is an Aliphatic Urethane and is said to be more chemically stable and will not crack, peel and fade under UV conditions as fast. That is how I understood the differences between the three, but time will tell how good this stuff really is. I went to Ameraguard of Lee’s Summit, MO, and Dan was a GREAT guy to work with. He was HALF the price of the Rhino and Line-X dealers around here, and his work truly is exceptional. He definitely went the extra mile for this project. I took off my Bushwacker fender flares and decided to spray this over my wheel wells and rocker panels to go with the flow of the sliders. Here they are back from Dan:
[img width=600 height=800]http://i164.photobucket.com/albums/u38/bigwapitijohnny/Sliders/IMG_1271.jpg[/img]
[img width=600 height=800]http://i164.photobucket.com/albums/u38/bigwapitijohnny/Sliders/IMG_1263.jpg[/img]
[img width=600 height=800]http://i164.photobucket.com/albums/u38/bigwapitijohnny/Sliders/IMG_1272.jpg[/img]
I also used some Permatex® High Temperature Thread Sealant to keep the water out of the sliders.
[img width=600 height=800]http://i164.photobucket.com/albums/u38/bigwapitijohnny/Sliders/IMG_1273.jpg[/img]
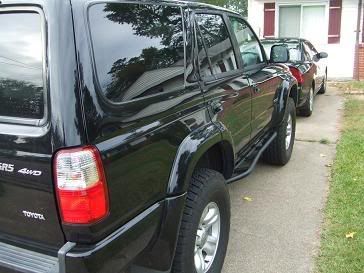
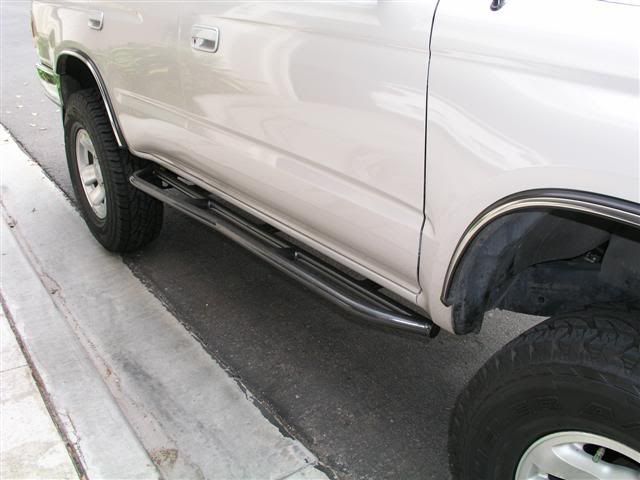
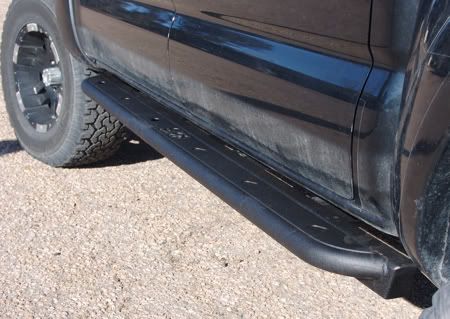
Slider install – The installation was not a big deal at all. Luckily, my first option crapped out on me (buddy flaked) and I found a small fab shop in Paola, Kansas. The shop is called TechtaFab. Duane is the owner of the shop, and you can tell that wheelin' is more than just a 'hobby' for him. He has a custom built rock buggy that he wheels all over the place, and his shop has all the goodies to get it done. In addition, he is very meticulous, and his attention to detail was exceptional. I bet he is the only guy in Paola that has a hydraulic lift in his own shop. I will be going to him to install my Sonoran steel 1.2 lift kit soon. Anyway, onto the final pics.
[img width=800 height=600]http://i164.photobucket.com/albums/u38/bigwapitijohnny/Sliders/IMG_1279.jpg[/img]
[img width=600 height=800]http://i164.photobucket.com/albums/u38/bigwapitijohnny/Sliders/IMG_1283.jpg[/img]
[img width=600 height=800]http://i164.photobucket.com/albums/u38/bigwapitijohnny/Sliders/IMG_1287.jpg[/img]
Regards,
BWJ


 Reply With Quote


