yes i did, thank you very much. hope to have it sent back to you by the end of the week.

yes i did, thank you very much. hope to have it sent back to you by the end of the week.
2005 Lexus LX470 - Stock for now...
1998 Toyota 4Runner SR5 V6 4x4 + a bunch of goodies. Lifted, Locked, Illuminated and Armored. Winner,"Best Offroad Truck" - 2010 Pismo Jamboree. It's been upside down and still drives me to work.


sweetI've got some
to do.
My signature
Okay, got the welding done, and installed my marlin rear inner seals. The marlin seals are pretty cool and idiot proof, I'll get pics up in a little bit.
I now need to drill and tap the two long studs. I would like to drill them with the third installed to insure I get them in the correct spot. My drill bit is a little short and I heard you can remove the actuator. I removed the bolts that look like they hold it on and it doesn't budge. Am I missing something or do I just need to tap it with a hammer? I think I removed 3 12mm bolts (one of those actually just holds the little cover on), am I missing something?
Edit: searched around some more and it looks like I just need to pry on it a little bit from a few sides. I just really did not want to force it without knowing for sure.
My signature
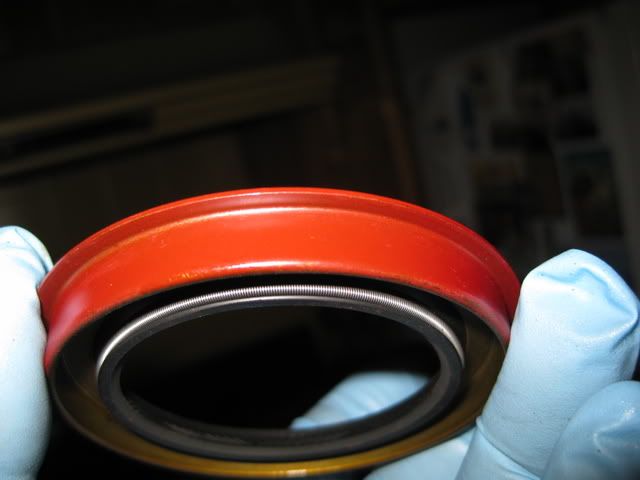
Here are the Marlin rear axle seals. They have a lip on them, so that you won't drive them in too far and fits perfectly in the groove so that all is flush on the housing. They also have the built in spring to help hold the seals shape, unlike the seals that I removed.
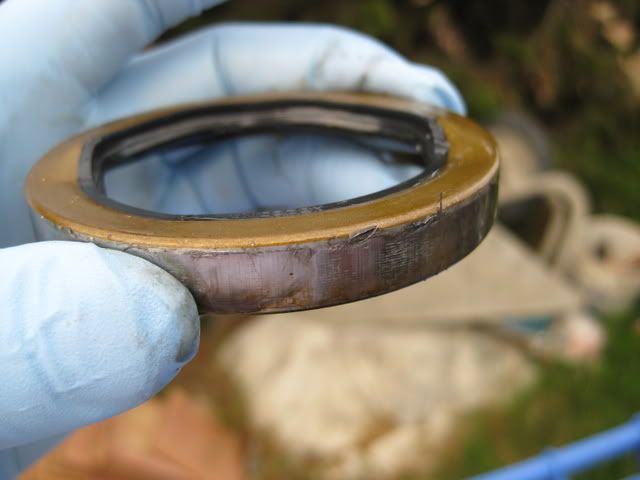
and the OEM one for comparison:
My signature
Well, are you done yet???
Maybe you've already read my method for locating the holes, but here it is again.
With the third member on, use a drill bit that's as close to the size of the holes in the 3rd member as possible. The less slop between the bit and the hole, the better. Drill just enough to put a dimple into the housing, about 1/4" in diameter. This will help the final drill bit stay centered when you drill. This method does the same thing as using a transfer punch.
-------------------------
Steve
1993 4runner, SAS, 3.0L, Auto Tranny
2007 4runner, stock. For now.

Yeah, I'm either going to use that method or the transfer punch. I just need to remove the actuator so that I can fit my drill and bit in there.
This all goes at a painfully slow pace when I'm doing it all myself (for the first time) and in my free time.It's supposed to rain this weekend, so it's not looking so good for getting this done before Surf n Turf.
Either that, or I'll be breaking in my new gears by driving up and down the beach.

My signature

I was able to keep the motor on, and just drill enough to get it started. I then removed the 3rd and finished the holes.
1995 4runner--SAS'd and armored--GONE
1998 4Runner--under construction--GONE
2003 4runner...the new project
nearly done...
Last edited by Seanz0rz; 08-25-2013 at 06:54 PM.
2005 Lexus LX470 - Stock for now...
1998 Toyota 4Runner SR5 V6 4x4 + a bunch of goodies. Lifted, Locked, Illuminated and Armored. Winner,"Best Offroad Truck" - 2010 Pismo Jamboree. It's been upside down and still drives me to work.
Dude! You rock!!!! I owe you a giant case of Diet Dr. Pepper
My signature
HAHAHA, yea i think in every picture i have there is a can somewhere...
and nah, you dont owe me anything. just put on an awesome pismo next year... haha.
2005 Lexus LX470 - Stock for now...
1998 Toyota 4Runner SR5 V6 4x4 + a bunch of goodies. Lifted, Locked, Illuminated and Armored. Winner,"Best Offroad Truck" - 2010 Pismo Jamboree. It's been upside down and still drives me to work.
 Posting Permissions

 Reply With Quote