-
Writeup: Hayden 678 Transmission Cooler
Transmission Cooler Installation Write-Up.
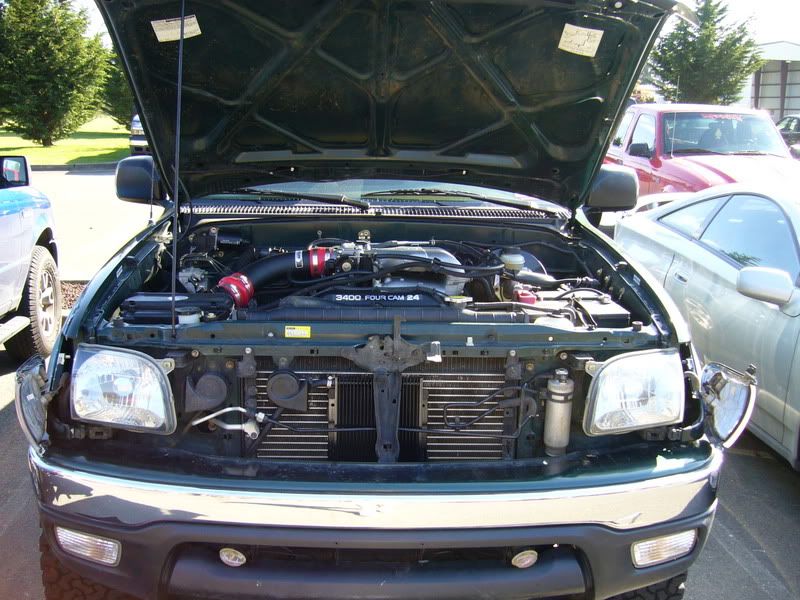
This write-up was written to show the installation of a Hayden 678 Transmission Cooler, on a 2004 3.4L Tacoma.
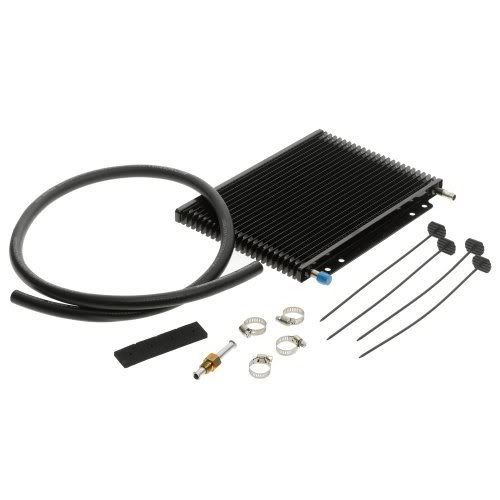
To start off you are going to need to head off to your local parts store and pick up the Cooler of your choice. I decided to go with the 678, however the 679 is a popular choice as well. While you are there it is a good choice to pick up an extra hose. There was a 4 foot piece sitting next to the coolers so I grabbed that one. You are going to need some extra transmission fluid as well to fill the empty part of the system. I bought some Toyota Type T from the dealer. You will end up needing about 2 quarts of whatever you use.
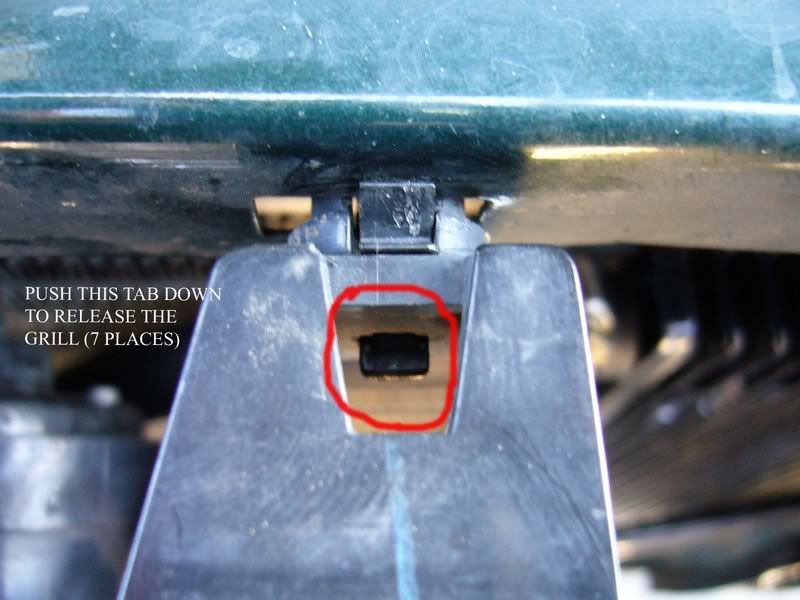
Ok so now that you have all the parts you can get started. First remove the front grill from the truck, and it will help to also have the skid plate out of the way. To remove the grill there are 7 clips that need to be undone. Just push down on the little tab and pull straight out. The side, blinker lights are going to need to be separated from the center grill, not hard but be easy on them as they have plastic tabs which can break easily. I found this out myself. There are also 2 screws connecting the grill and the lights. These screws are found top.
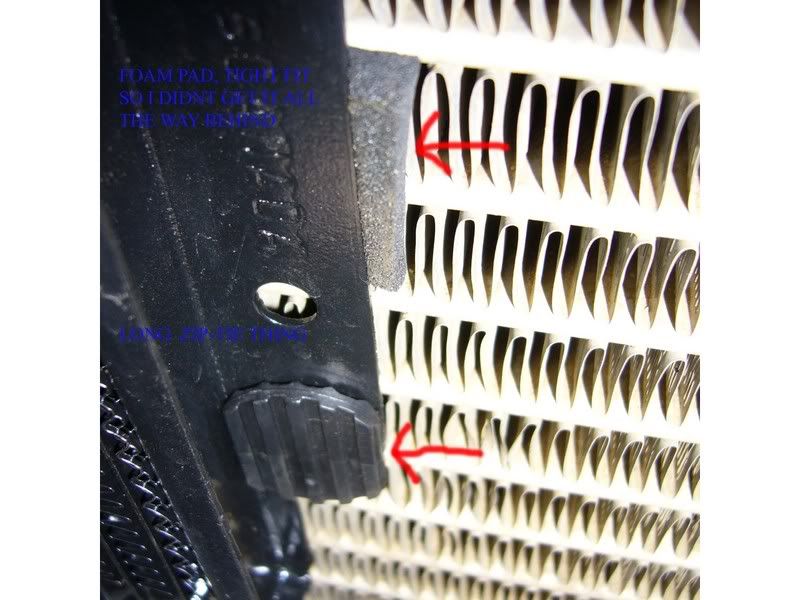
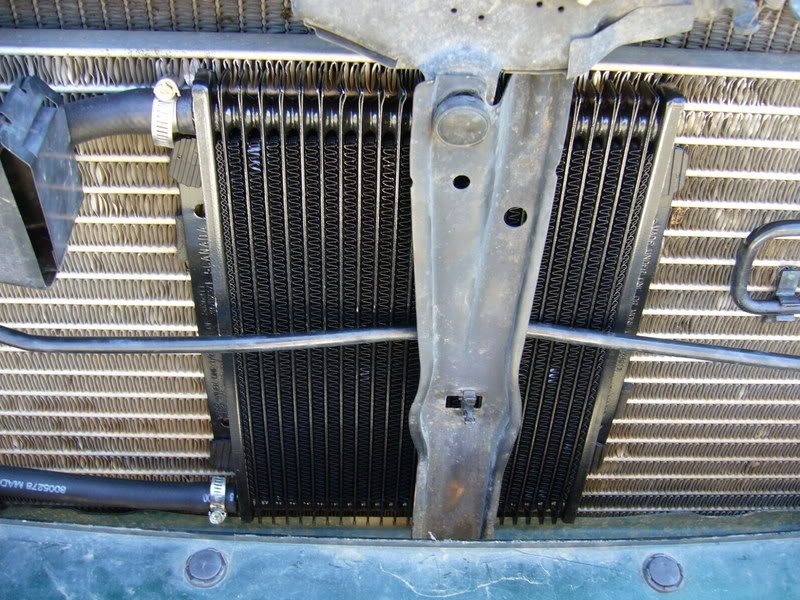
Now that you have room to work you can place the cooler where you want it. I put it center on the AC condenser, but feel free to move it over if you’d like. And you can mount it horizontal or vertical, it does not matter. Once you get it in position try to pull it away from the Condenser and place the sticky-back foam pads onto the backside of each corner of the cooler. You can now secure it with the long black zip-tie type secure pieces. These will go all the way through both the AC condenser and the Radiator. You will need to cut the excess off so that they are free from hitting the fan.
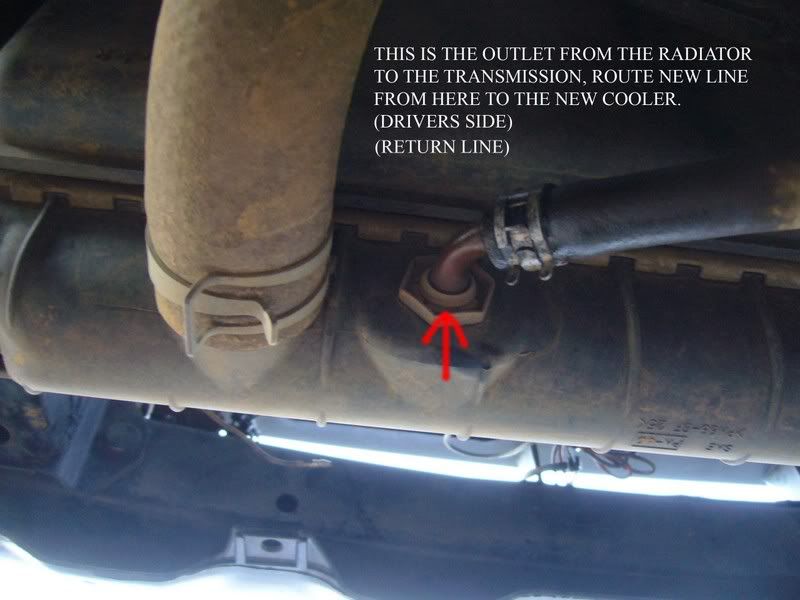
Now to actually connect the cooler. You can decide to go from Transmission – Radiator – Hayden Cooler – Transmission OR Transmission – Hayden Cooler – Radiator – Transmission. Either way is fine but I went with the first option so the stock radiator takes the most heat first. You are going to have to trace the lines from the Transmission to verify which one is the Output and which is the Input, . The output should go straight to the Radiator so there is no need to mess with this one. Now run a new line from the Outlet of the Radiator to the new Hayden Cooler. It doesn’t matter which port of the cooler it goes to. Then route another new line from the other end of the cooler back to the transmission hard line. This will complete the system.
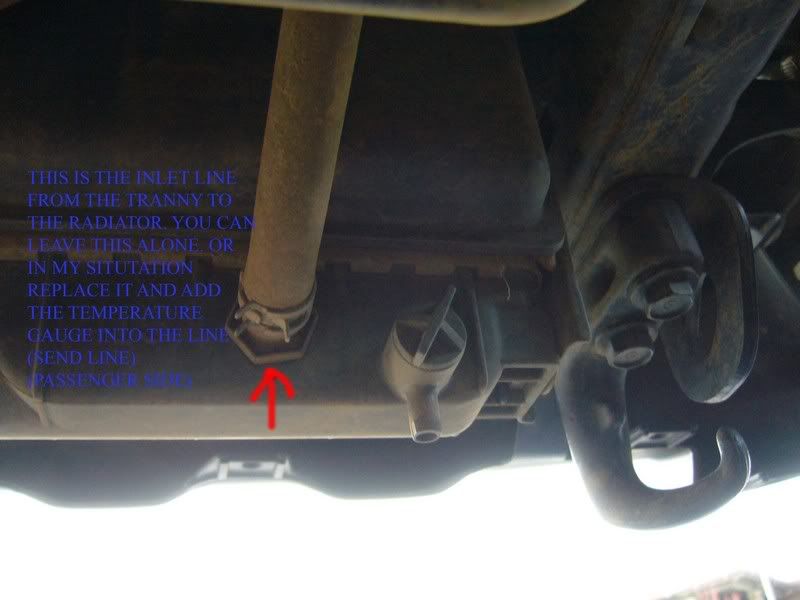
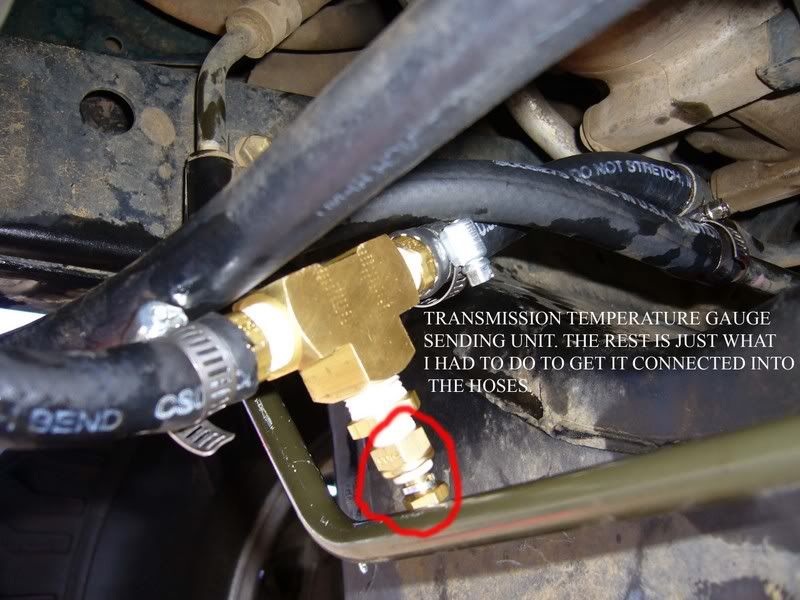
While you are at it you can add a Transmission Temperature Gauge. It is best to mount this as close to the Transmission as possible however that means you are going to have to splice into the Hardline. I decided not to mess with this and just added the sender into the hose, yet before it reached any cooling device. (Mine is not wired up yet)
The installation of these two is not very complex, especially since I could do it. However here are a few tricks. When removing the hoses from the hardline, just cut them. You wont need it again since you will have new hose. The new 4 foot section is handy. Have a bucket or bottle handy to catch fluid from the hoses, there’s not much but it will make a mess.
Now that you are done. Start up the truck, fill up your tranny fluid and off you go. I hope this write up was clear enough and will help you install your new Transmission cooler. If you have any questions, please feel free to PM me.
 Posting Permissions
- You may not post new threads
- You may not post replies
- You may not post attachments
- You may not edit your posts
-
Forum Rules


 Reply With Quote