Results 1 to 7 of 7

Thread: Baja Camera System, From The beginning

  1. #1

    Baja Camera System, From The beginning

    It was suggested to me, that I post this modification, in this section. This is copied from my build page.
    I have been thinking about having spotting cameras, for a few years now. After some research, I contacted Total Vision Products, of Tucson AZ. http://www.totalvisionproducts.com/ After lengthy conversations, we decided to meet and formulate a plan for the system I wanted. Trust me it evolved, from my initial thought.
    After 2 years of thought and about 8 weeks of install. (the weekend warrior way) Here is what we created.
    Rod Developed the system . I did the fabrication and install.
    This was my first thought, 2 monitors in my visor, after a few attempts, I didn't like the whole deal
    [img width=800 height=600]http://i668.photobucket.com/albums/vv45/puulboy/DSCN2363.jpg[/img]

    Second attempt
    [img width=800 height=600]http://i668.photobucket.com/albums/vv45/puulboy/IMG_0002.jpg[/img]

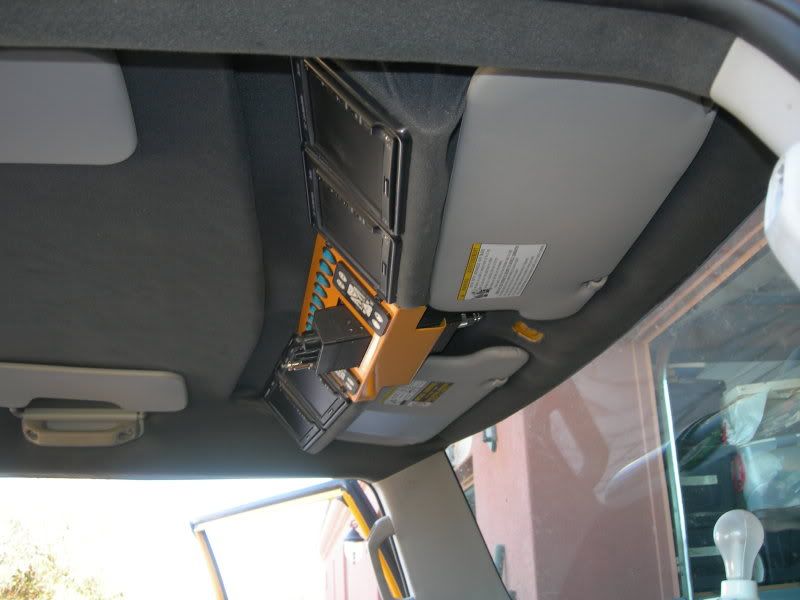
    Look Ma , more monitors
    [img width=800 height=600]http://i668.photobucket.com/albums/vv45/puulboy/IMG_0011.jpg[/img]

    I needed to make everything function correctly, you are seeing my positioning so the visors still work
    [img width=800 height=600]http://i668.photobucket.com/albums/vv45/puulboy/IMG_0013-1.jpg[/img]


    WIKID has eyes for you... Teaser shot of her new LOOK so to speak.
    Believe it or not I do not have the pictures of my final product before I installed it. I must have been busy.
    I will say its one piece and came out nice, after I got all the angles exact.
    Note: I have been asked to recreate this system, in another FJ, so I will get pictures then


    I have a few details to write up, as it's progress happens.
    While I am doing this project, I am adding stuff as I go.

    Since the headliner is down, I am doing a few things to make life easier.
    Wilson 1000 antenna roof mounted. Say good bye to the lil will Mag mount. You won't see cables on the roof now. This antenna is about the best you can get for a CB. The really nice feature is, you can unscrew the base of the antenna, with you hand and screw a cap on the stub, so you don't have to have the antenna up all the time. Its just a little black cap that is left.


    I decided to quiet the beast some, with a product from Second Skin Audio
    Sound Deadening Materials for Noise Reduction from Second Skin
    The product is called Damplifier Pro. kills, vibration, heat and noise
    It comes in 12"x20" sheets that have paper you peel to adhere to the roof. Its very sticky and I cannot see it coming off even if you begged it.


    Next will be another insulation product I glue to the face of the Damplifier Pro
    Its about 1/2 to 5/8th thick called "heat wave" and has great insulation properties
    Second part of insulating


    I left it short till I secure the rest of my stuff but it will be finalized after it it all done


    Today was the beginning of the camera mount and wiring days. I completed 3 camera installs and ran about 80% of the wire/cables Location, location, location, was the theme of the day.
    The picture below shows 2 of the 3 cameras installed today.
    Camera 1
    Drivers side on the roof Narrow view camera that shows lots of distance but not as much on the sides
    Camera 2
    Passenger side a wide angle but not much distance
    My logic behind where there are mounted is..
    I wanted to be able to easily clean them without having to make some kind of boom to reach the center ( remember I am short) I decided to follow the line of the washer nozzles. With that I also needed to establish an axis for where center would be in front of the truck. 8Ball and I worked it out with much effort


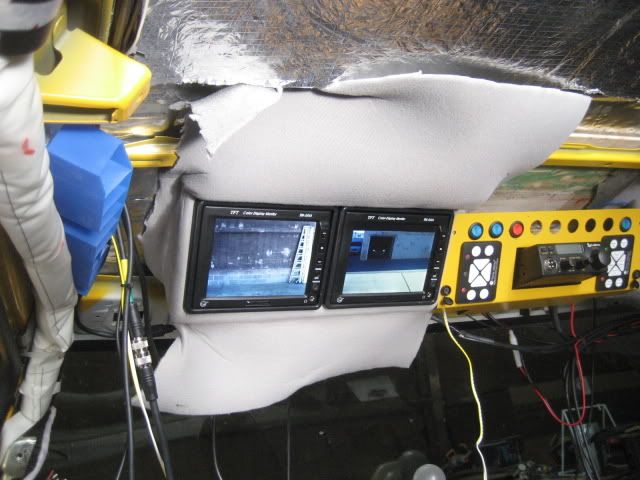
    Progress on the overhead console

    I used headliner material to cover the monitor pods and made a center section which will house both of the keypads, cb radio and a few other goodies I have planned for it.

    Here is a sample Keypad that will control the cameras. The center was cut and formed from 18 gauge steel. Angles were important along with forming a rigid back edge


    One more view from the back of the truck.
    The top edge should be the approx height of the headliner


    I am working with Rod from Total Vision of Tucson, AZ. Total Vision Products: The new standard in mobile vision products I gave him the thoughts I had and he developed the system. We are working together with the install. So far my end of the install is almost done. Rod is designing another system that could be a great addition to the FJ crowd along with others who may want something like it. The system being designed is not this involved for the install. Mine is just over the top. I will post more details about that soon
    The wife's TT will be fitted with that system this weekend


    Just a small update. Besides all of the wiring I accomplished the oh center console is painted and fitted.

    I am pleased with the way it came out. There are still some things to add to it but it is on the way to being complete.

    Next will be one more set of cables to run then the headliner can go back up.
    I am waiting for the cables though

    I will start with a view from the drivers seat while driving home from Tucson. The left picture is facing forward from one of the 2 front facing roof cams. The right picture is the long view rear roof cam picture. I was hoping to catch this guy pickin his nose


    We have most of the system in and 2 of the cameras viewing.

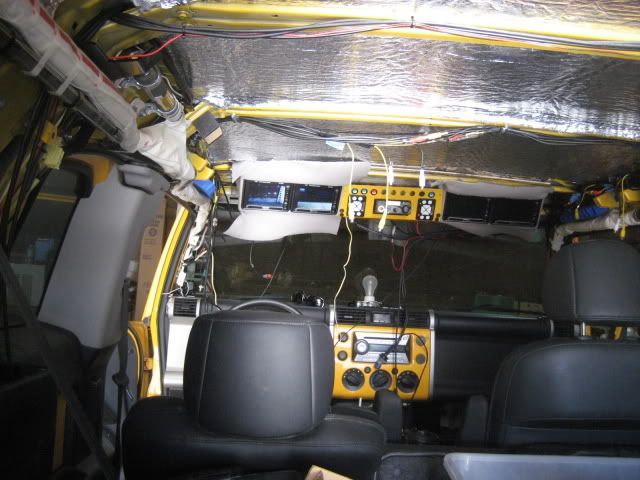
    There is lots of wiring and configuring to do. This is the semi complete oh console after today's progress


    Even though it doesn't look like it, we are fairly close to trimming everything out and doing final adjustments, before the headliner goes back up. Its a slow process because this is totally custom and there are many things that come up while we progress


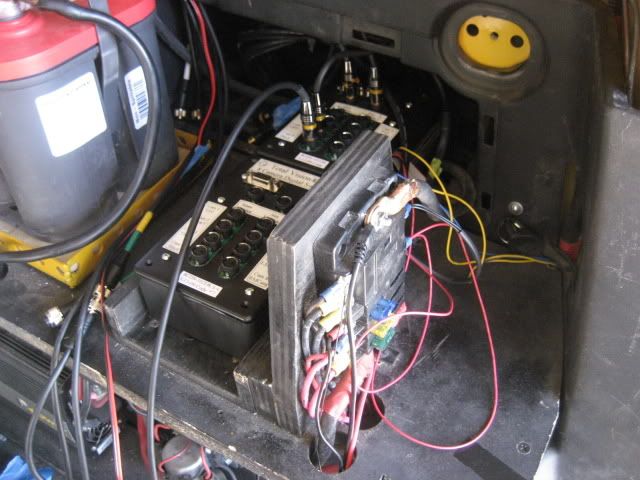
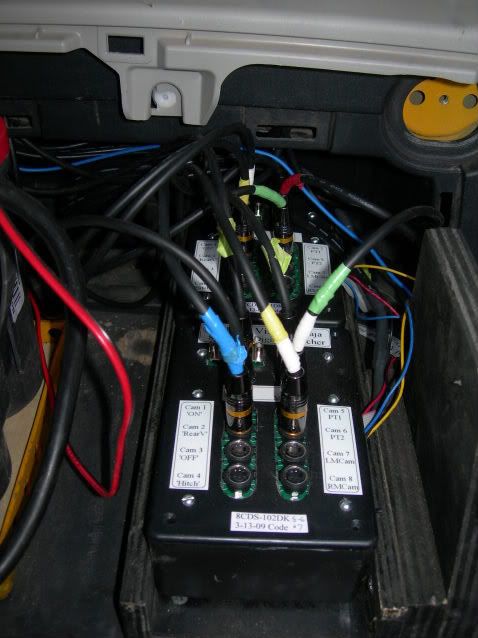
    Wiring in the 2 ecu's that are controlled from the keypads on the console


    I can't wait till I can start putting stuff back together. It seems like the more we do the more we take apart, but that's the fun of making something from nothing.

    The part you don't see is the DVR. I forgot pictures of it, but pictures will follow

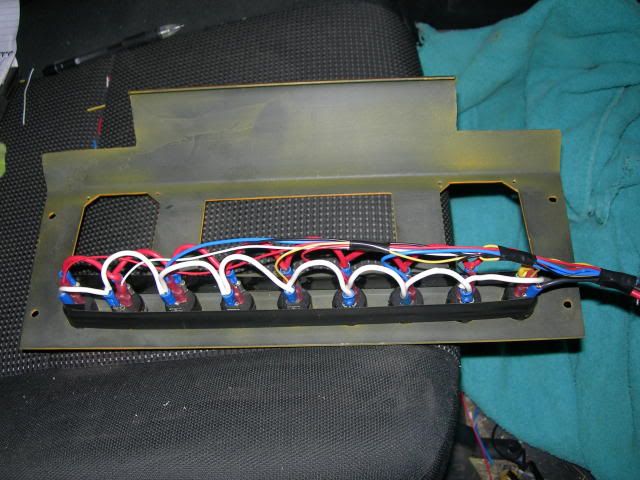
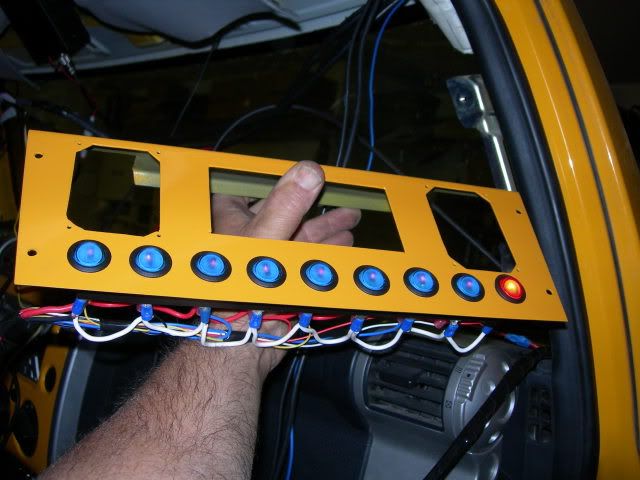
    I decided to make a harness for all the switches in the OH console. I ran one 12 gauge wire for power and a ground. Then soldered and wired each switch. I used (2) 5 wire cables to use as trigger wires to run to all of the accessories that will need to be switched. I should never have to pull anything apart in the roof area to add anything from now on .


    This is just a pic of all the switches being tested


    Of the 9 switches in the console 5 are already dedicated off-road light and The Baja Camera System.

    Today is camera install day part 2
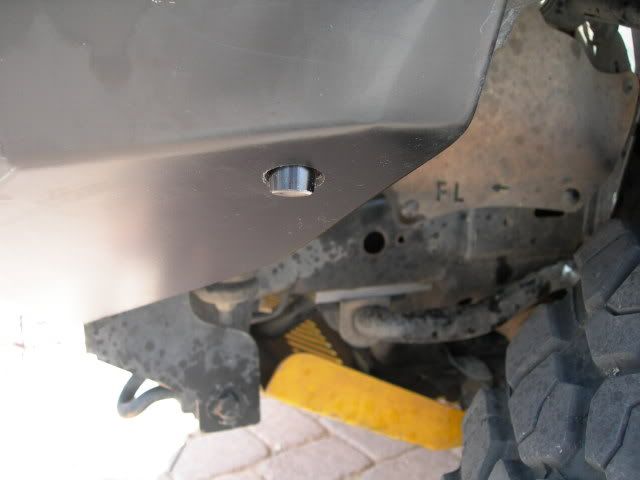
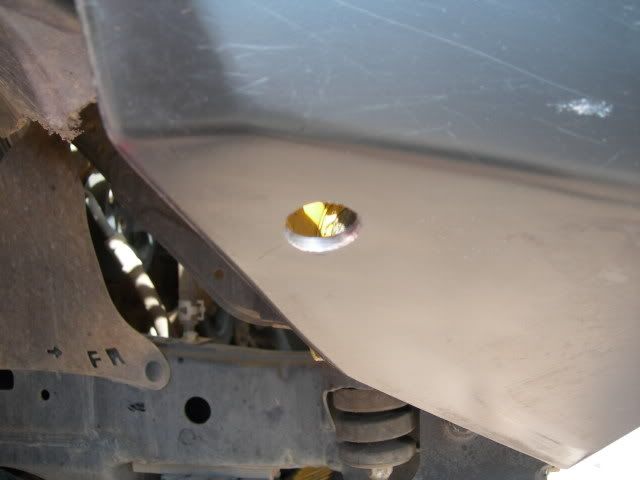
    Here is a rock spotting camera located on the front drivers side. The passenger side has the same


    I drilled a 1" hole angled down and painted the exposed edge. The camera's have brackets that are epoxied in place


    Approach angle camera


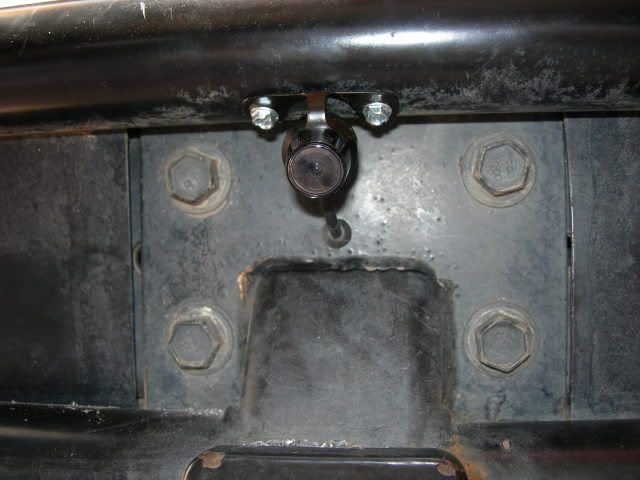
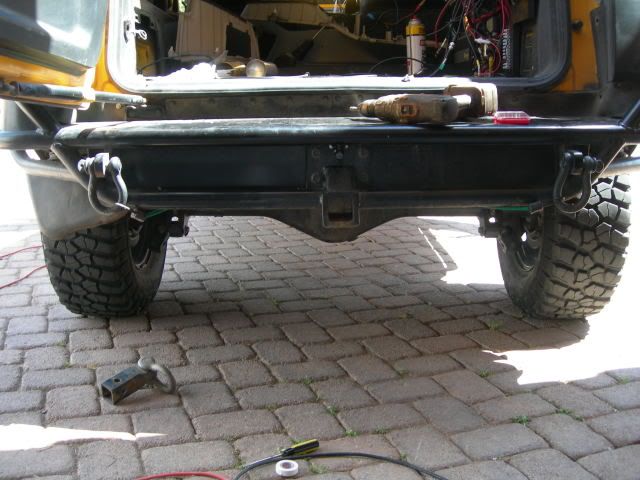
    Here is the departure camera or backup cam


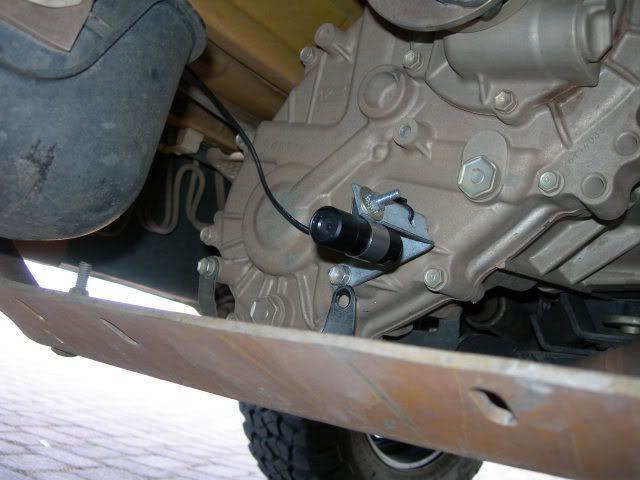
    Rear axle cam protected buy my skids and with clear view of the dif and inner tires


    Quad channel DVR with GPS tracking and alarm mode


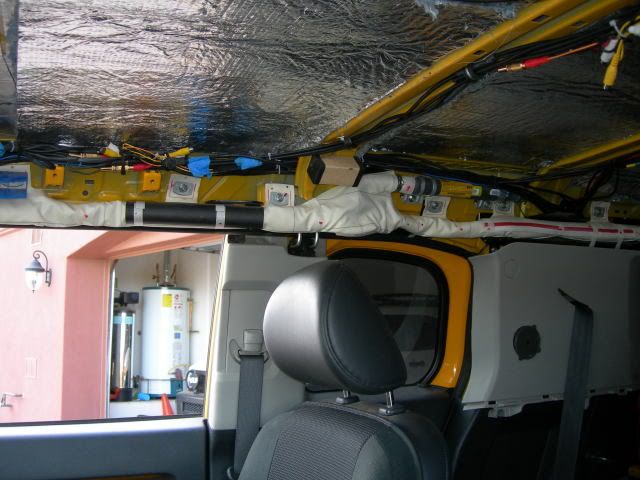
    Here is the wiring finalized. It will not move or show after the headliner is installed. We still have to test the whole system before the headliner goes up just in case..


    Here are the 2 ecu's wired and ready for testing. I am going to make a wire keeper for the top of this where all the wires that come out of the ecu's will so have support above them so they won't wiggle out. Testing mode doesn't require neat appearance til I know its right


    more to follow....


    AZFJ Founding Memberwww.wikidfj.com&nbsp; under construction<br />http://wikidfj.blogspot.com/<br />Member build page<br />http://www.fjcruiserforums.com/forum...other-gal.html

  2. #2

    Re: Baja Camera System, From The beginning

    As part of my Camera mod I have had to relocate a few things
    This is a picture of the way my GPS was mounted before the Camera Mod


    Since this is close to the configuration I am dealing with now the GPS needed a new home


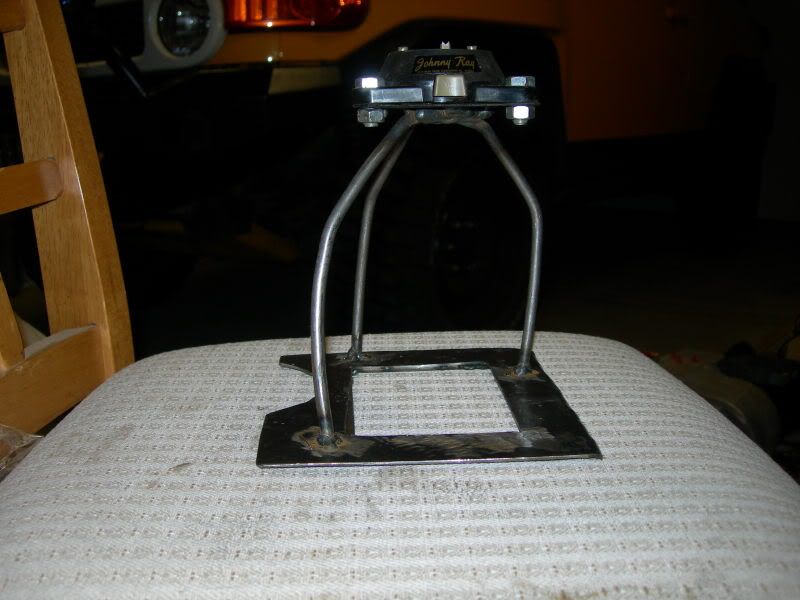
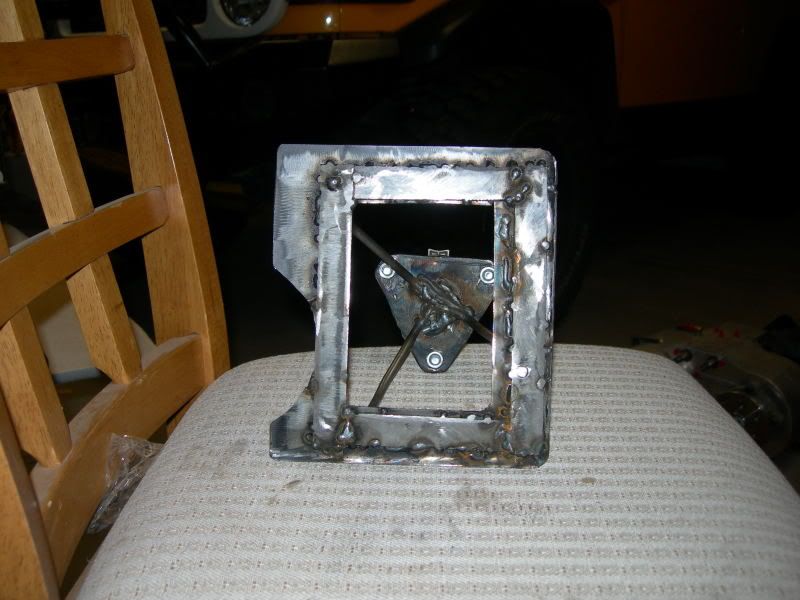
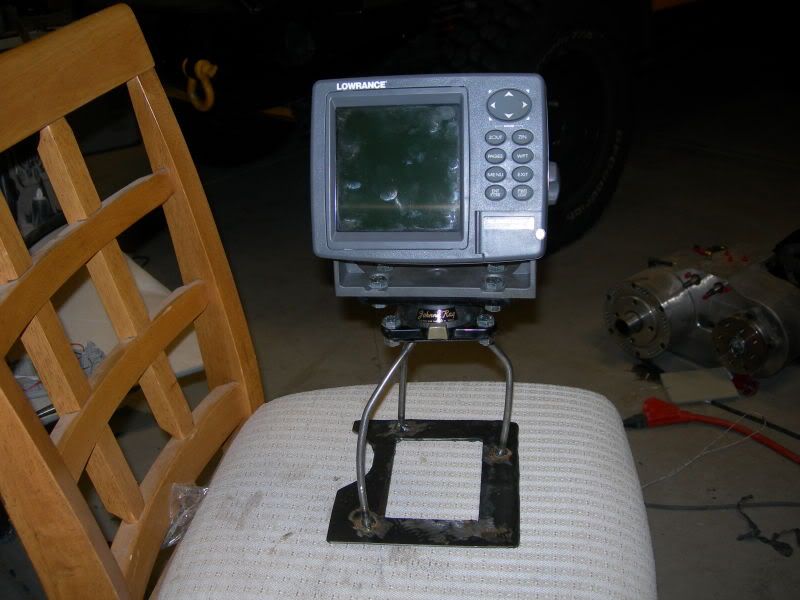
    Here is what I fabbed up today to make that new home for my Lowrance


    Pardon the sloppy look I tack welded it in many places not to distort the metal. I will clean it up and paint it.


    This has a swivel mount from a fishfinder like it was in it's previous location


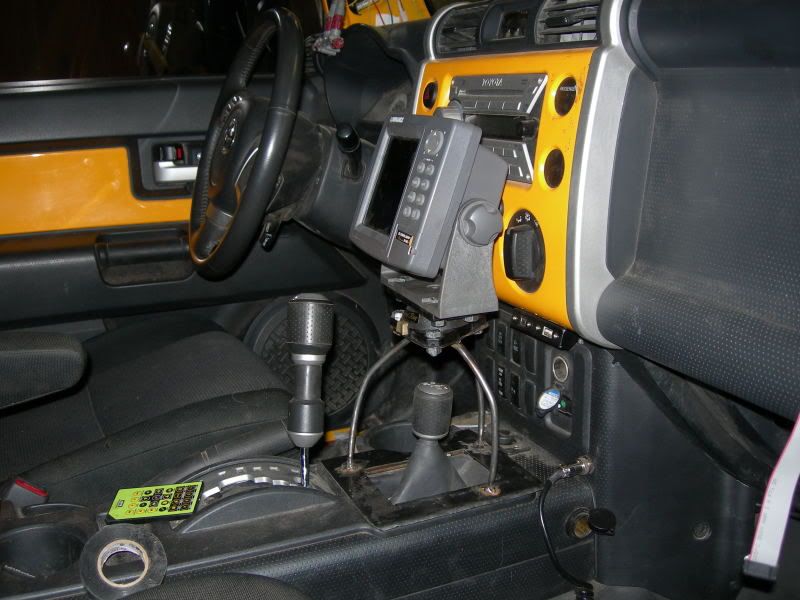
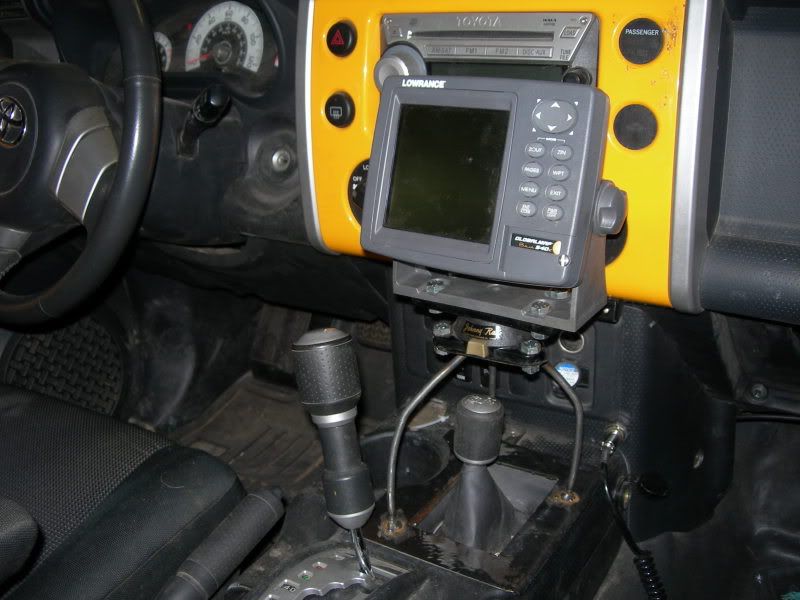
    Here it is where it will be mounted. I still have access to the transfer case shifter and all the controls on the dash along with still being able to see the radio controls


    I made the angles specific so I could still shift with no interference. Its 16 gauge steel with formed edges and 1 inch bar stock to re enforce the lower plate then 1/4 inch dowl rod bend and joined in the middle with a baseplate welded on top to attach the mount

    I can now reattach my rear view mirror.

    I may mount it with industrial strength velcro but am still pondering it as of now. I am open for suggestions on the mounting though.

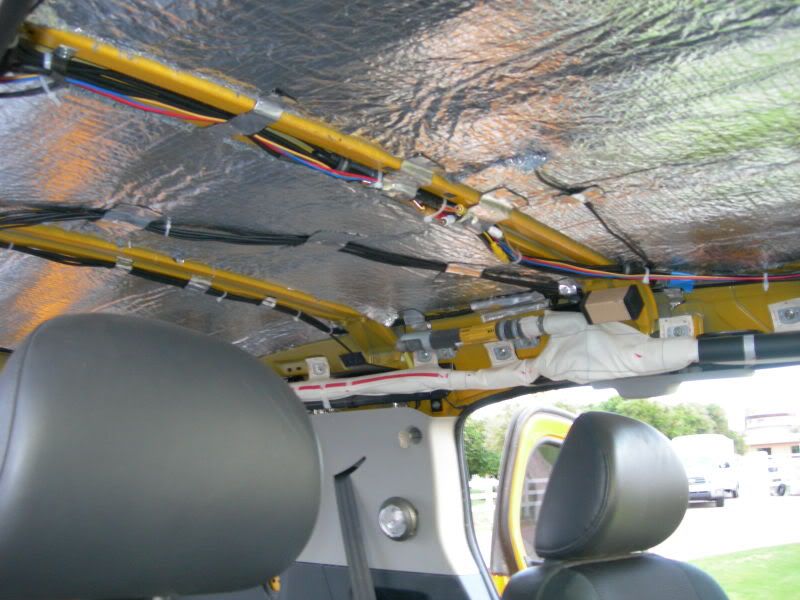
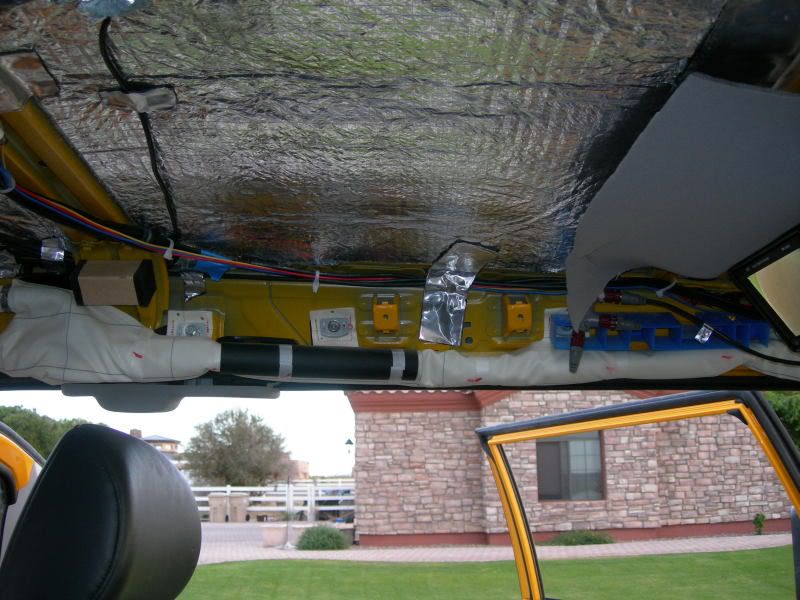
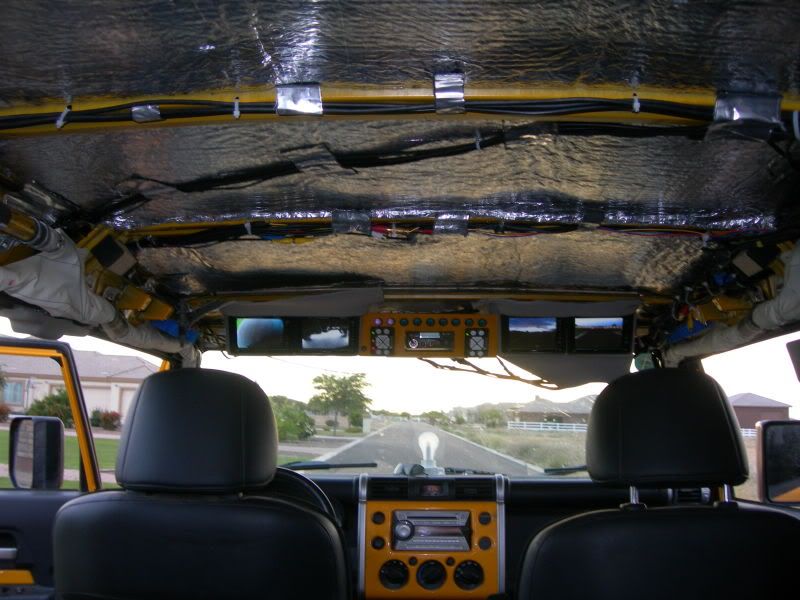
    Ok After testing my system in a local rough wash area, I cannot get the video system to mess up so I think it's ready to finalize. The picture reflects wires secured with the sound deadening. I used strips of it to stop possible wires coming loose and rattling in the headliner. The sound deadening is extremely sticky, so I doubt it will come loose. Everything else was wire tied into position


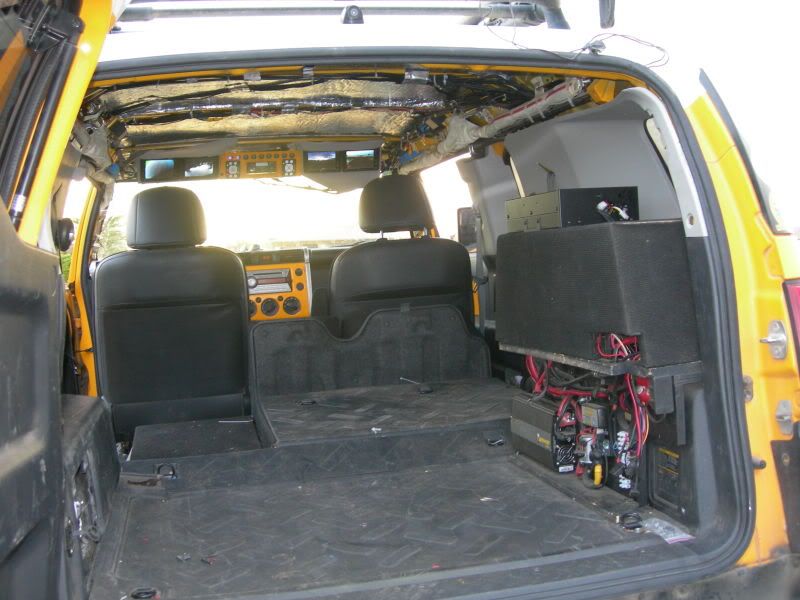
    Everything in the rear is secure and the next step will be to secure the OH console and tie wires out of the way.


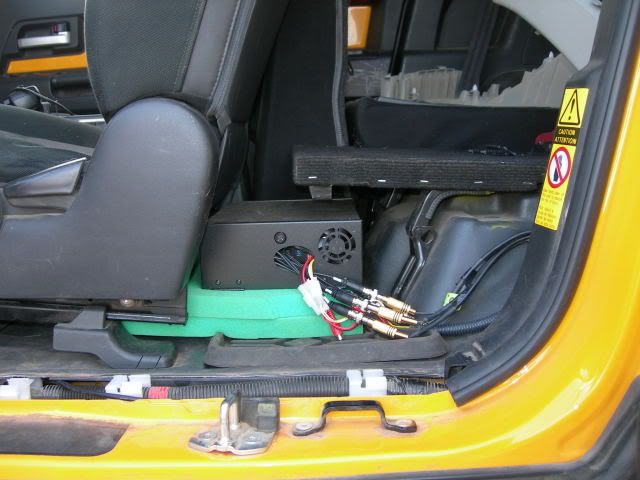
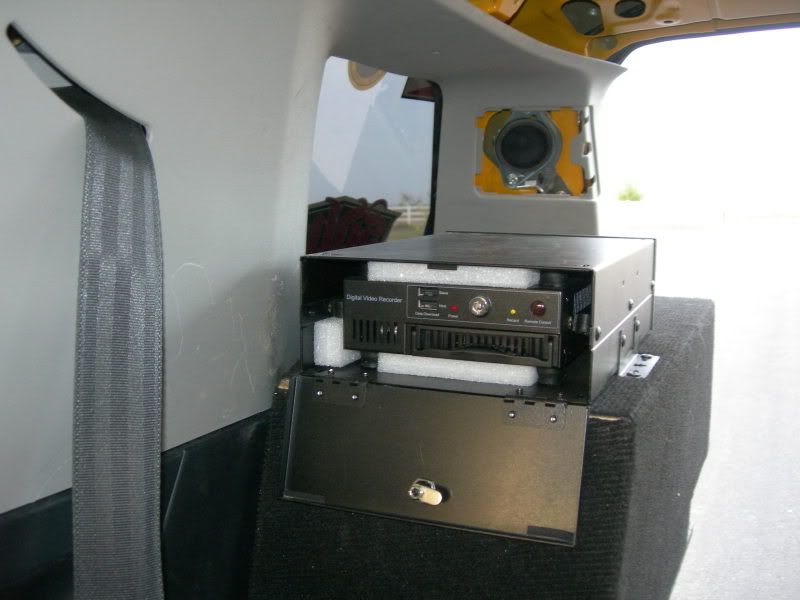
    The DVR is now mounted in a different location so it will be easier to control it with the remote. Top of my rear Battery box is where I chose. If you look at my gear box, on my build, it fits against the battery box so you only see the carpeted boxes instead of wiring

    View from the passenger front. If you look closely you will see that the DVR is actually recording

    It felt good to install trim panels. It makes me feel like progress is made
    Taking matters into my own hands I will post up the headliner install
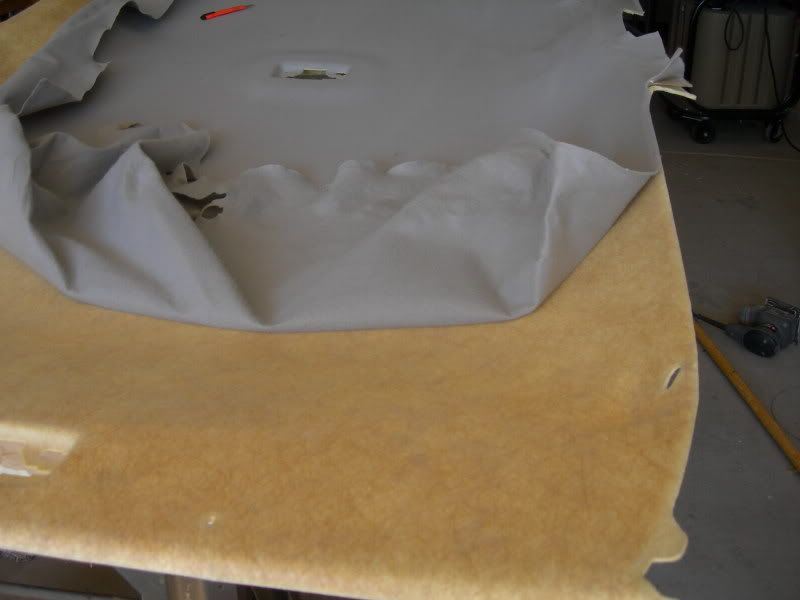
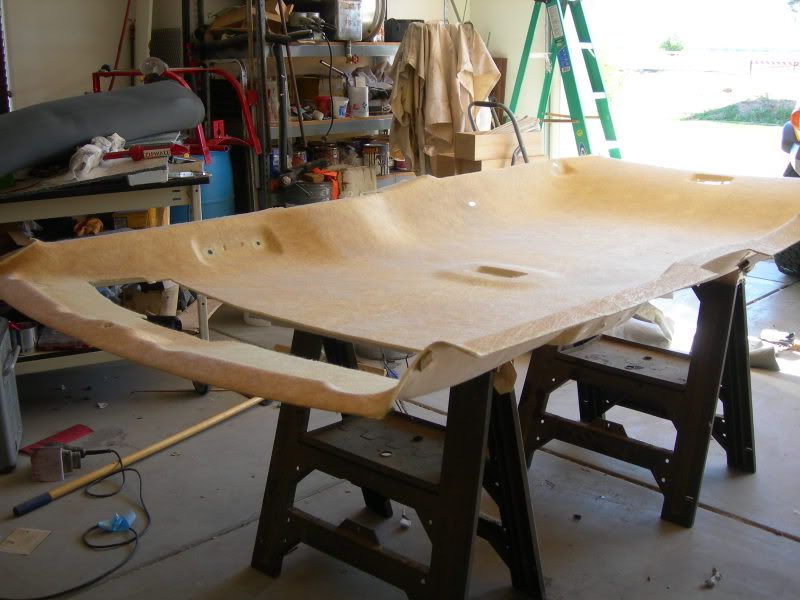
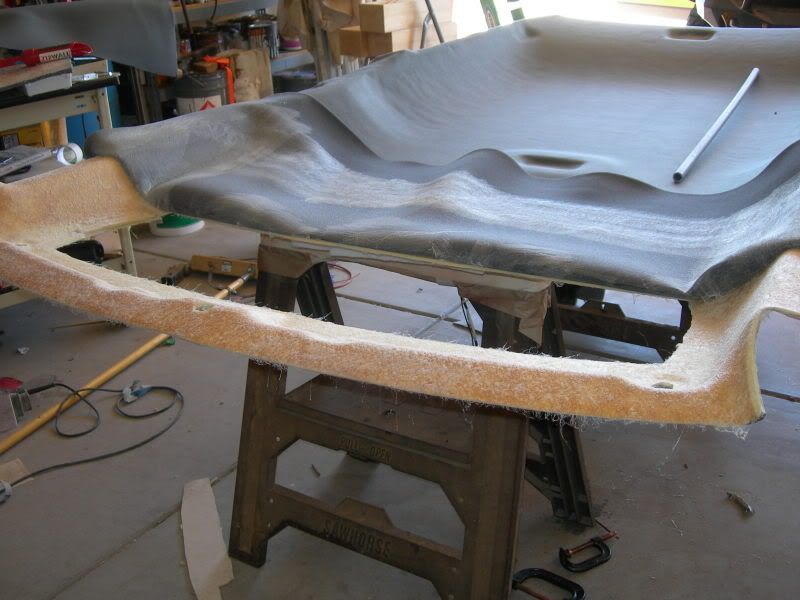
    First picture is what needed to happen to get this project underway. My wife and I peeled the old skin off the headliner. It took some time and patience, but came off nicely


    Presto its magic. Off with the old


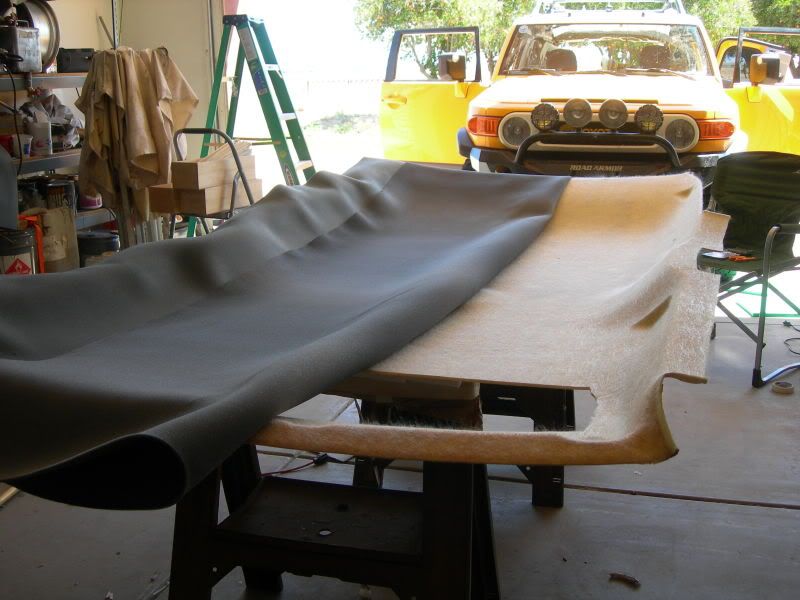
    The headliner color I chose was a graphite. I wanted to rich it up some, since I was changing it anyway.

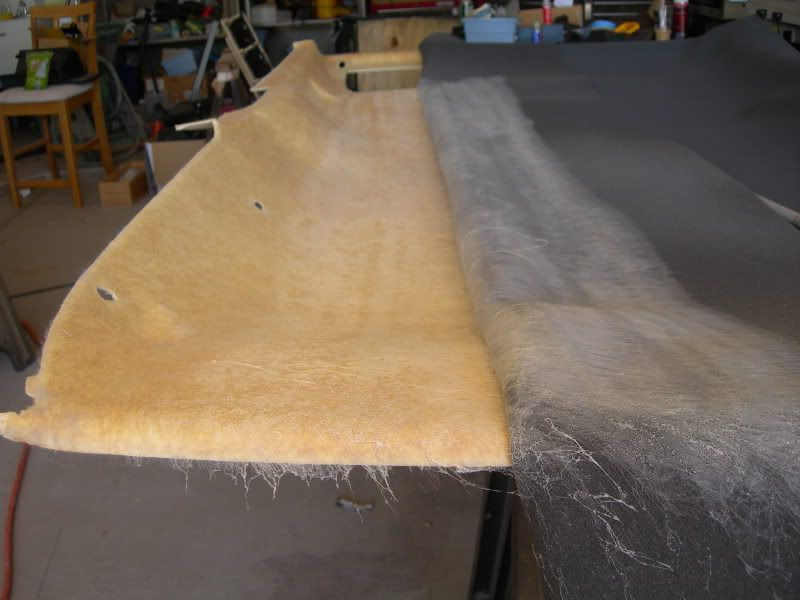
    The method we chose was to lay it out then fold it half over and begin spraying the headliner glue in a section at a time


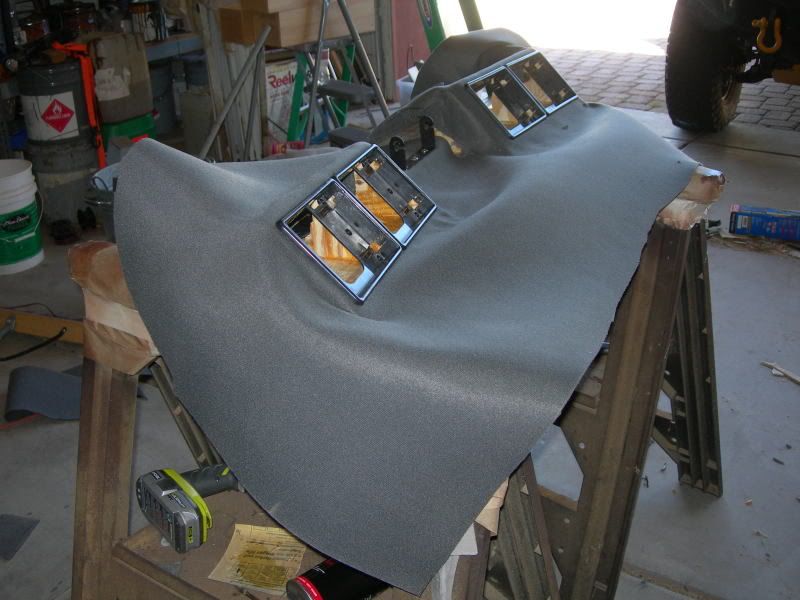
    The last part was where the modification was needed for my monitor pods


    Since I changed my mind on colors I had to redo the monitor pods in the correct color. That took the most time since I had to pull everything down and pull all the monitor cases out to make a clean install over my custom console. It was worth the extra effort for sure.


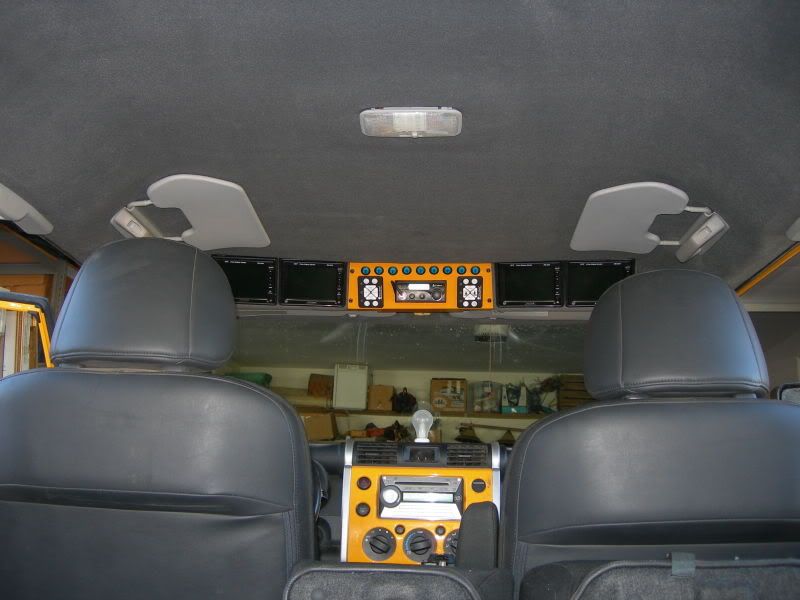
    Installed and making small adjustments on it


    After taking a ride it is more quiet than it was before all the insulation.


    I bought too much headliner material because I wanted to be ready for problems. 8 yards of headliner, 3 cans of headliner adhesive and 6 hours is what it took to do it from start to finish. $99.89 is what the project cost me.
    My wife was a really big help on this end of the project. I am fortunate she allows me to play with my toys and humors me when I ask her opinion of my latest brainfarts

    I am so glad I didn't leave it up to an incompetent shop to do this. It came out the way I wanted it to.
    The jury is out on the gray accents, visors etc they actually look pretty good when you see it in person. I may or may not recover them to match the headliner
    This project is pretty close to being complete. I have to put my Don box back in, the frig, the dvr and I am ready for some awesome trail video.

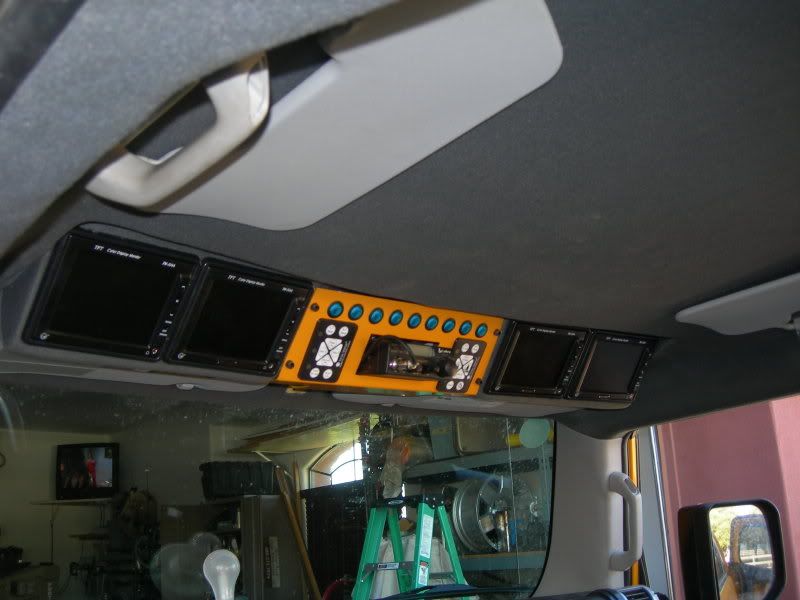
    One more picture to show the complexity of the orientation of the monitors. I wanted to make sure I could have full use of the visors, so this part was difficult and I made many adjustments on it.


    Thank you everyone.
    Comments like these have helped in my motivation, when it seemed as though things were not happening as they should. It's all good now.
    Its been rewarding to accomplish something that has been in my mind for awhile.. The bonus is, it worked out better than I even expected to. It's been a long 6 or 8 weeks , but I really enjoyed the challenge. I expect to get lots of trail video. Group runs should be fun along with trail interviews
    AZFJ Founding Memberwww.wikidfj.com&nbsp; under construction<br />http://wikidfj.blogspot.com/<br />Member build page<br />http://www.fjcruiserforums.com/forum...other-gal.html

  3. #3

    Re: Baja Camera System, From The beginning


    I was hoping I would see the write-up for this over here!
    I wandered over to your build thread and was reading up on it a bit.
    Very impressive!

    I will be reading more into it, I have a few questions lingering in my head but I want to make sure I didn't skip anything in the thread!

    THANK YOU!!!

  4. #4

    Re: Baja Camera System, From The beginning

    Quote Originally Posted by YotaFun


    I was hoping I would see the write-up for this over here!
    I wandered over to your build thread and was reading up on it a bit.
    Very impressive!

    I will be reading more into it, I have a few questions lingering in my head but I want to make sure I didn't skip anything in the thread!

    THANK YOU!!!
    I actually added some to the beginning. I left out the preface and more of the first concept attempts so I added it. Please look at the beginning again, ity may make more sense.
    Thanks for the comment. Questions are always welcome .
    AZFJ Founding Memberwww.wikidfj.com&nbsp; under construction<br />http://wikidfj.blogspot.com/<br />Member build page<br />http://www.fjcruiserforums.com/forum...other-gal.html

  5. #5

    Re: Baja Camera System, From The beginning

    i almost did this with my carpc when i still had it. so awesome! major props to you!
    2005 Lexus LX470 - Stock for now...

    1998 Toyota 4Runner SR5 V6 4x4 + a bunch of goodies. Lifted, Locked, Illuminated and Armored. Winner,"Best Offroad Truck" - 2010 Pismo Jamboree. It's been upside down and still drives me to work.

  6. #6

    Re: Baja Camera System, From The beginning

    Wow...cool setup!
    -Daniel2000 4Runner Sport | V6 | 5spd | 4x4 | Leather | 265/75-16 BFG AT/KO | OBA | BudBuilt front skid

    1990 4Runner SR5 | V6 | Auto | 2wd | 3.90 rear | Cobra CB | 265/65r17 Bridgestone Duelers H/Ts | '08 Tacoma 5 spoke rims | Has an 11:1 crawl ratio! SOLD

  7. #7

    Re: Baja Camera System, From The beginning

    Very impressive setup you've created for yourself.
    - Jamie<br /><br />1996 SR5 4Runner 4X4 Auto, Deckplate Mod,&nbsp; Hayden Tranny Cooler,&nbsp; Amsoil Air Filter, OME 881/906 N86C/N91SC Lift - SOLD, but still miss it!<br /><br />2005 Silverado 2500HD Duramax Diesel 4WD

Posting Permissions

  • You may not post new threads
  • You may not post replies
  • You may not post attachments
  • You may not edit your posts
  •